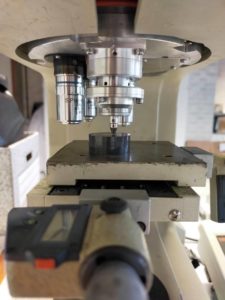
The samples are hardness tested using Mitutoyo HM-124 Vickers microhardness testing apparatus. This involves indenting the surface of the sample with a diamond pyramidal indentor of interfacial angle 136degrees under a 20kgf load, before measuring the diagonal diameter of the indent under an optical microscope.
The hardness of the sample is proportional to by the ratio between the diameter of the indentor and that of the indentation, and represents the ability of the material to resist plastic deformation. As the measurement is made by eye, and therefore prone to human error, a calibration is first performed for a material of known hardness, to provide a conversion for the operator.
Figures
Figure One: Vicker’s microhardness apparatus in action: the diamond indentor can be seen to be under loading, indenting the sample. This will leave a pyramidal indent whose dimensions may be determined under a microscope.
